Visualizing the Resistance

To engage participants in understanding how antibiotics work and how resistance develops, this hands-on workshop uses data visualisation techniques. By observing bacterial growth and antibiotic action, elements of the Kirby-Bauer test are adapted to translate treatment experiences into petri dish representations, linking personal stories with scientific evidence to foster data literacy and dialogue on responsible antibiotic use.

This workshop provides a hands-on experience to explore antimicrobial resistance through practical microbiology activities designed for easy replication in diverse settings. Through interactive, hands-on activities in a real microbiology laboratory, this workshop immerses participants in the science of antimicrobial resistance by answering fundamental questions such as: What are antibiotics? How do they work? What does antimicrobial resistance mean? The activity refers to the 
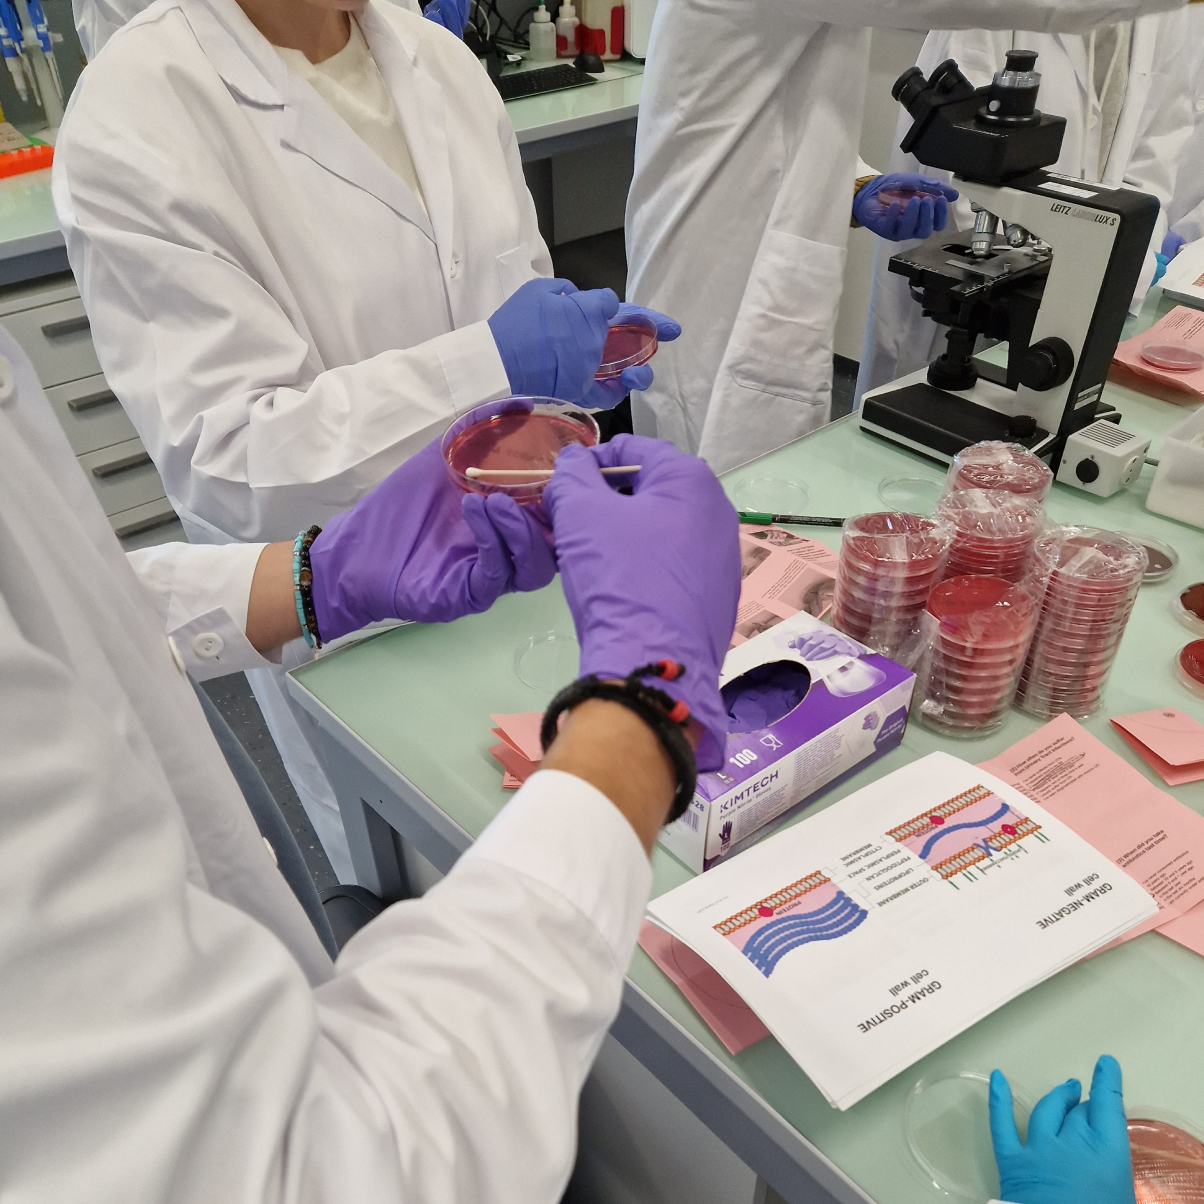
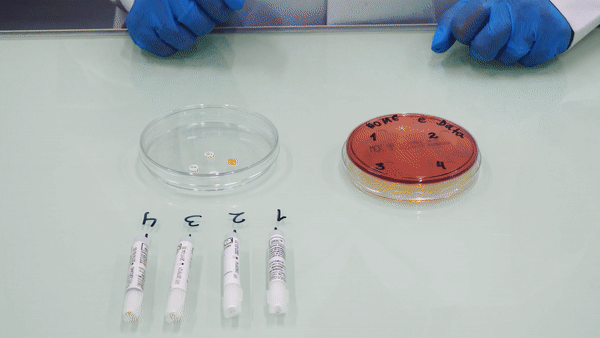
concept of the antibiogram, which is the action performed by scientists in the laboratory to test 
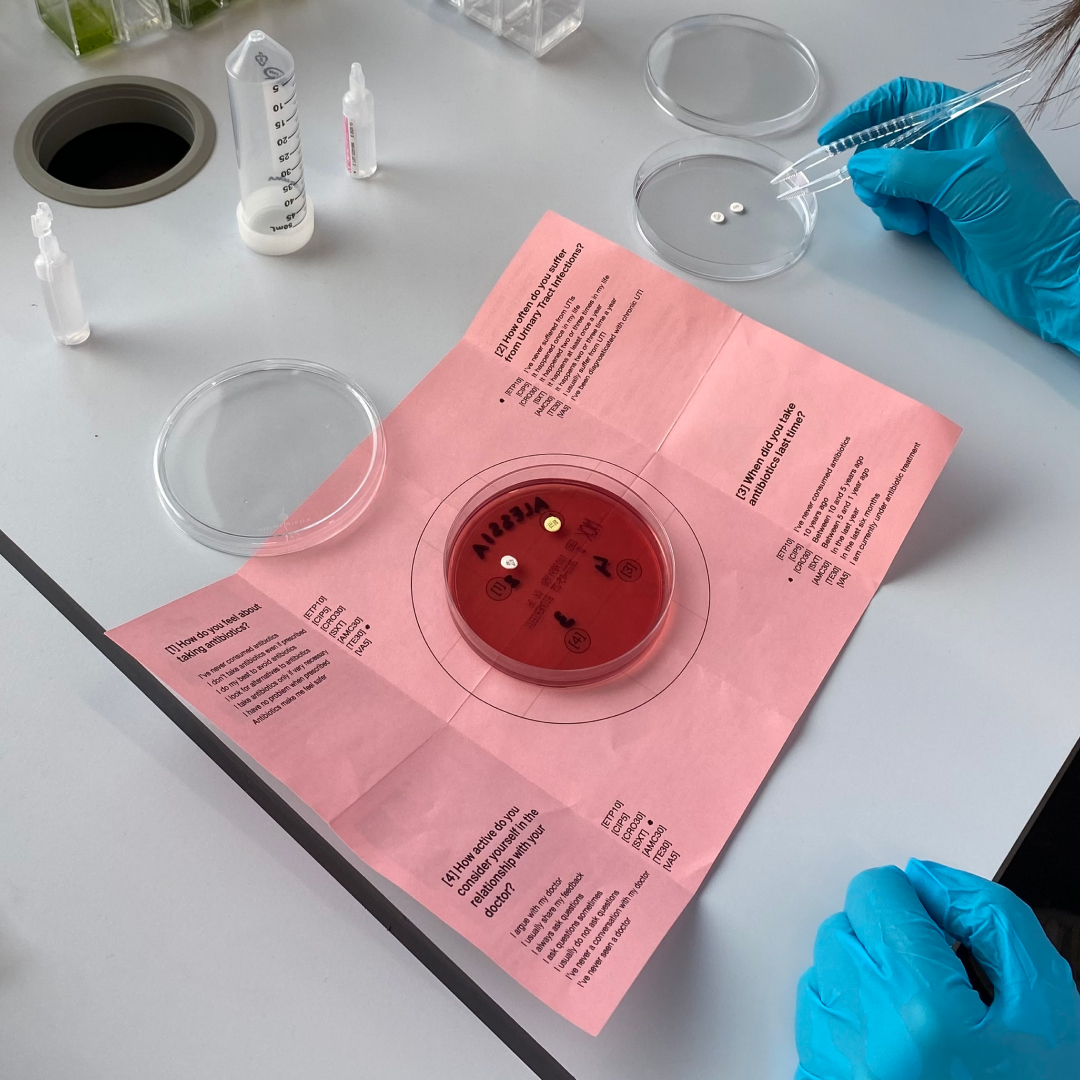
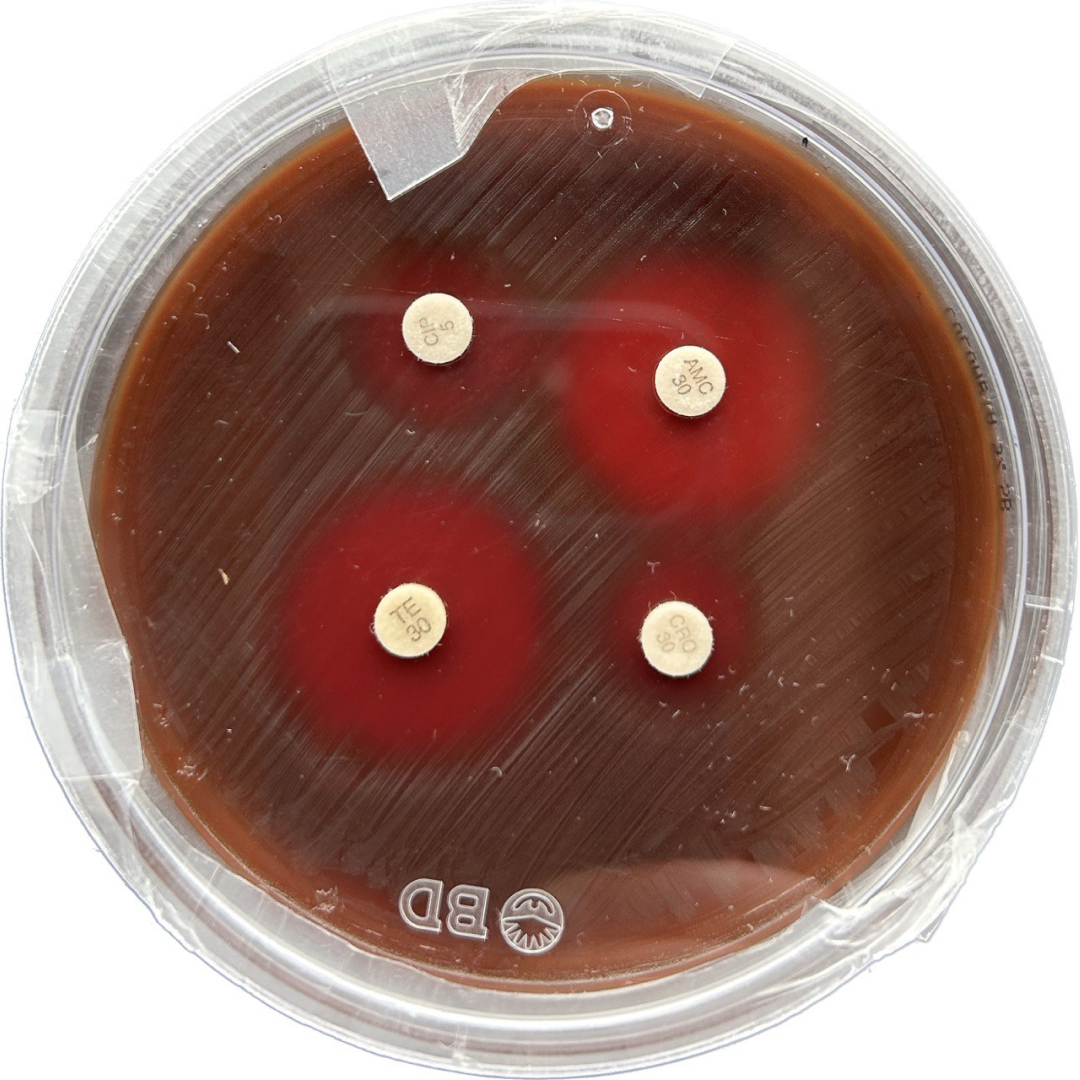
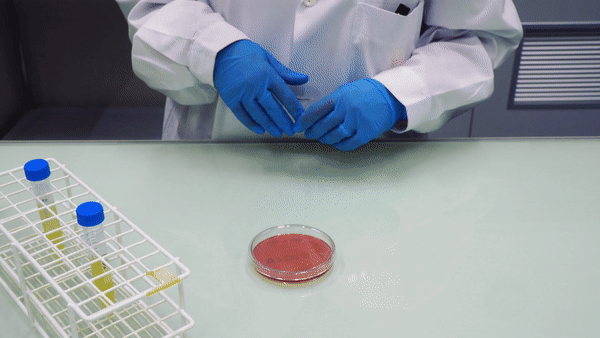
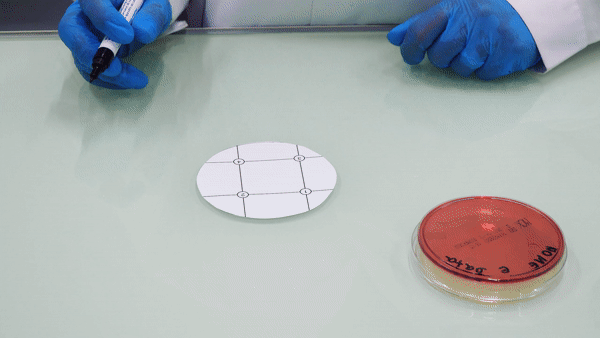
the efficacy of antibiotics on specific bacteria. In order to do so, antibiotic pills are placed 
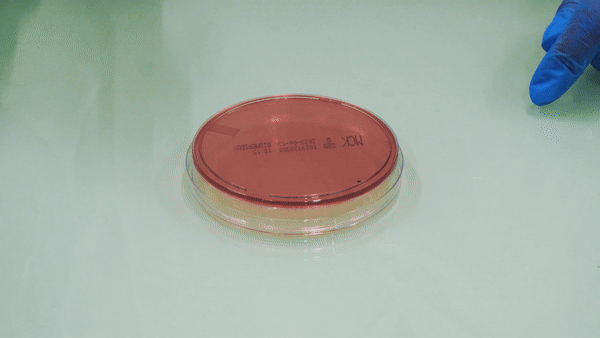
into a transparent lidded dish (called Petri dish) covered with bacteria. After some cultivation hours, it is possible to observe the efficacy of antibiotics that prevent bacteria from growing. The higher the antibiotic efficacy, the less the bacteria spread, leaving an empty space around the pill. On the other hand, the smaller the area, the higher the resistance development of microbes which are not affected by the antibiotic.

Participants begin with an introduction to antimicrobial resistance and the importance of responsible 
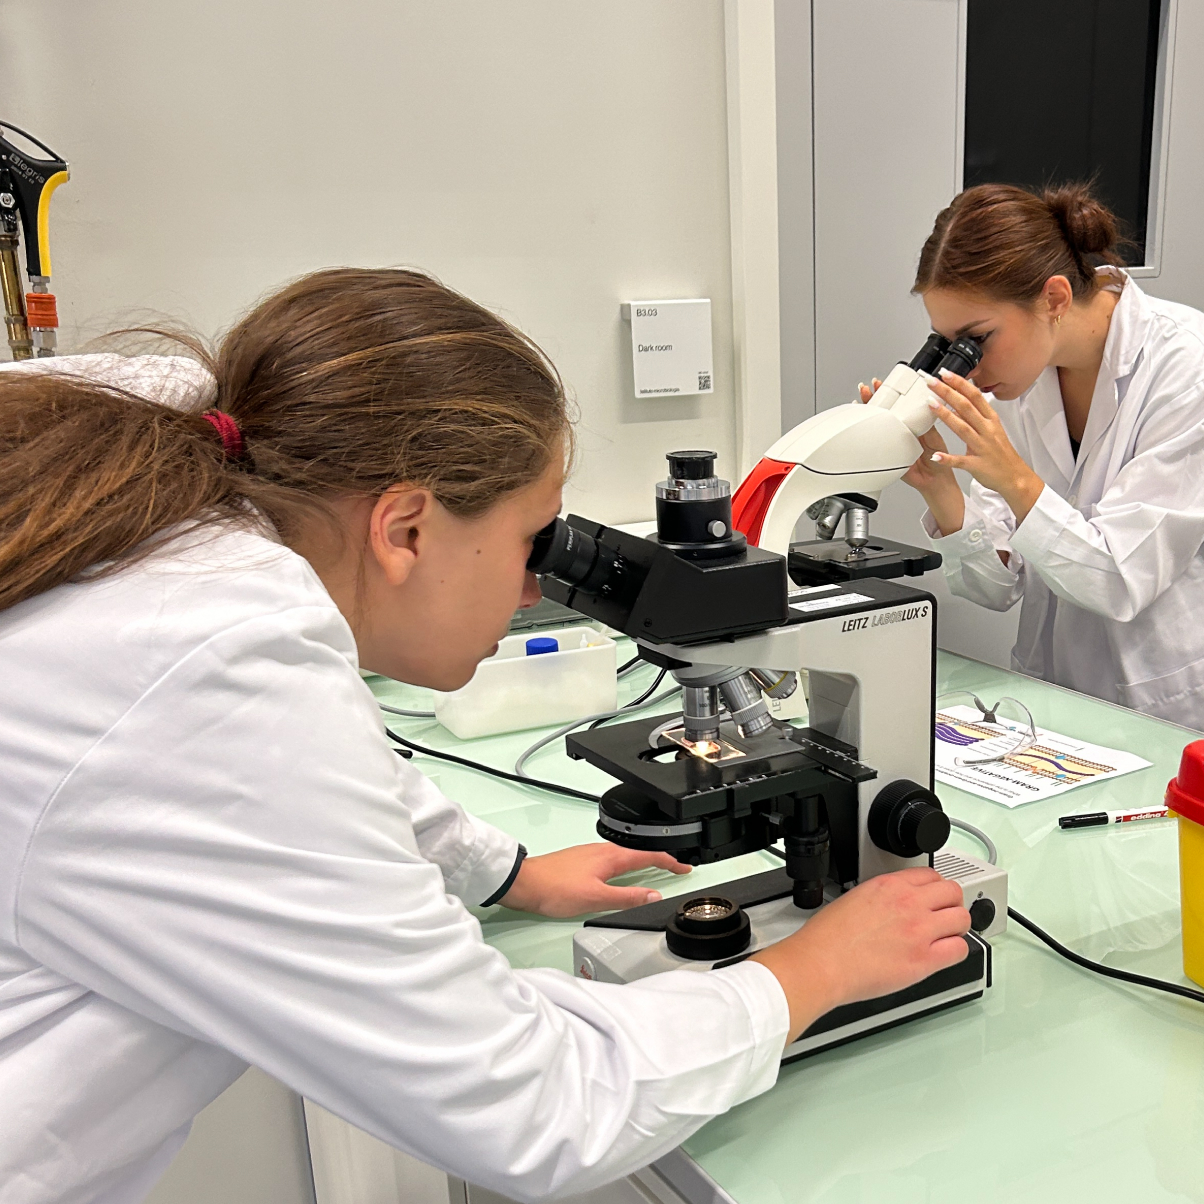
antibiotic use. They then move to a microbiology laboratory, where safety procedures are explained, and they learn about antibiotics and bacterial differences through microscope observations. 
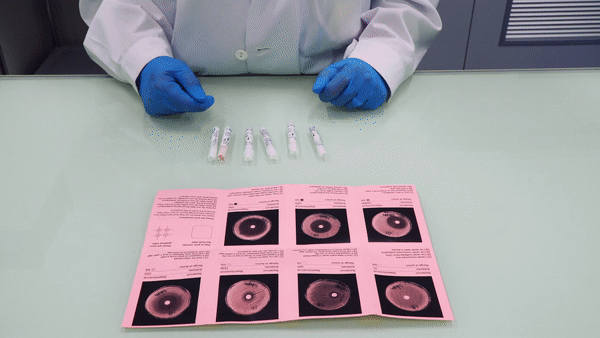
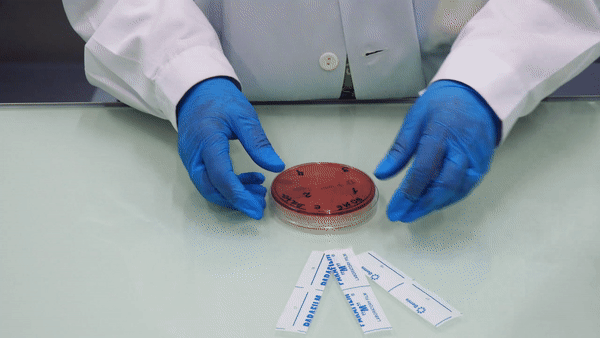
Following step-by-step instructions, participants culture bacteria, Escherichia coli first, on Petri dishes and place antibiotic pills based on their personal responses to questions about antibiotic use and health habits. After incubation, the clear zones around the antibiotics where bacteria do not grow reveal the effectiveness of each drug and highlight the link between individual behaviour and resistance development. The workshop combines rigorous scientific content with interactive and creative engagement to empower participants in the fight against antibiotic misuse. Because the activities involve live microorganisms and antibiotics, they are conducted in microbiology laboratories and facilitated by microbiology experts who co-designed the format.

with

The format has been developed in collaboration with Cristina Fragoso Corti and Pamela Princi, and was hosted at the Applied Microbiology Laboratory of SUPSI. Since 2012, Cristina has been a researcher at SUPSI’s Laboratory of Applied Microbiology, focusing on microorganism detection, characterisation, and applied research. She graduated in Microbiology from the Catholic University of Porto in 2000 and earned a master’s degree from the Institute for Research in Biomedicine in Bellinzona in 2002. Pamela Principi is a senior researcher and lecturer at SUPSI’s Institute of Microbiology, leading the Environmental Biotechnology sector. She holds a Biology degree and a Ph.D. in Chemistry, Biochemistry, and Ecology of Pesticides. Since 1999, she has focused on applied microbiology in environmental and cultural heritage projects, with experience in European research and international collaborations.

protocol

The following steps were shared with workshop participants to support them in the process of transforming a Petri dish into a visual canvas for expressing personal experiences with antibiotic use and urinary tract infections. It provides instructions on how to prepare the dish, select antibiotic pills based on individual responses, and position them to reflect one’s relationship with healthcare and antibiotic consumption.

[Step 1] Brush your Petri with bacteria
First, you need to "brush" your Petri dish with bacteria to prepare the surface. This activity will be repeated twice, using two different types of bacteria: Escherichia coli, a gram-negative bacterium, and Enterococcus faecium, a gram-positive one. Dip the swab in the liquid and brush it from top to bottom of the surface to add the bacteria to the Petri dish. Take care to avoid breaking the fragile base and repeat the action three times in different directions. Be careful not to speak while the Petri dish is open, as bacteria from your mouth could contaminate the results.

[Step 2] Label your Petri according to the procedure
Close the Petri dish and turn it upside down. Then, write your name and the date on the bottom of the dish. This is a standard procedure in microbiology laboratories, as labelling the base (rather than the lid) ensures that the information stays with the sample even if the lid is accidentally switched. It also helps in keeping track of different experiments over time.

[Step 3] Select the pills based on your answers
Read the questions regarding your experience with antibiotic consumption, urinary tract infections and your relationship with the doctor and select the antibiotic pill corresponding to each of your answers. The name of the antibiotic is written close to the answer, between brackets.

[Step 4] Number the quadrants for each of the questions
Place the guide face up on the table and position the Petri dish upside down over the rounded shape. Through the Petri dish, read the numbers on the guide and write them onto the dish. Each number corresponds to an answer, helping you place the pills correctly and allowing us to match your responses to the right questions.

[Step 5] Position the pills
With the help of the tweezers, place each pill in the corresponding quadrant of the Petri dish and repeat this for each question. Apply gentle pressure using the tip of the tweezers to ensure the pills stay securely in place. Be careful not to speak while the Petri dish is open, as bacteria from your mouth could contaminate the results. Close the Petri as soon as you have done.

[Step 6] Close and refrigerate the Petri
To ensure the Petri dish is properly sealed, use Parafilm, a stretchy, waterproof film designed to seal containers like Petri dishes. It prevents contamination while allowing some air flow, making it ideal for microbiology work. After storing the dish for 48 hours at 20°C, you will be able to see the effect of the antibiotics on the bacteria: higher resistance is shown by smaller clear zones around the pills, while lower resistance results in larger clear zones, indicating the antibiotic’s effectiveness in killing the bacteria.

resources

↗ Step-by-step guide
↗ List of materials
↗ Antibiotic resistance manifesto
↗ Evaluation kit

sessions

A total of five sessions of this activity have been conducted, involving approximately 40 participants. Two workshops were open to external participants recruited through the project’s network and local pharmacies; two were tailored for nursing students with limited laboratory experience; and one was developed for master’s-level design students, introducing them to the themes of antimicrobial resistance and antibiotic use within the context of a design challenge.

results

The activity resulted in a collection of individual Petri dishes that visually represented participants’ answers to questions on their use of antibiotics and experiences with urinary tract infections. These were later organised into digital form, enabling comparison across participants. The results highlighted differences in behaviour, such as taking antibiotics only when strictly necessary versus using them more frequently without consulting a doctor. Alongside these visual data, conversations and written notes provided further context, adding personal perspectives to the quantitative responses. This combination of information offered insights into how people understand and approach antibiotic use, while also indicating the variety of attitudes and levels of awareness present within the group.

Publication